Physical Address
304 North Cardinal St.
Dorchester Center, MA 02124
Physical Address
304 North Cardinal St.
Dorchester Center, MA 02124

A private event is more than just a gathering; it’s a curated experience for a select group. This exclusivity allows for targeted messaging, stronger community building, and more meaningful interactions than a public forum.
Hosting your private event on Izzy Africa empowers you with tools designed specifically for this purpose:
Now that you are up to speed with the benefits, here’s how to setup your private event in just 3 easy steps:
If you don’t already have an account, use this link to create one with Izzy Africa, it’s a straight forward process that requires just a few details.
After signup and sign-in, there’s a button that says “Create an Event” on the Overview page, click it and proceed to filll in the details about your event. As earllier mentioned, you can use the undisclosed option in the location field to hide your event location temporarily but still reveal the city where it will be happening.
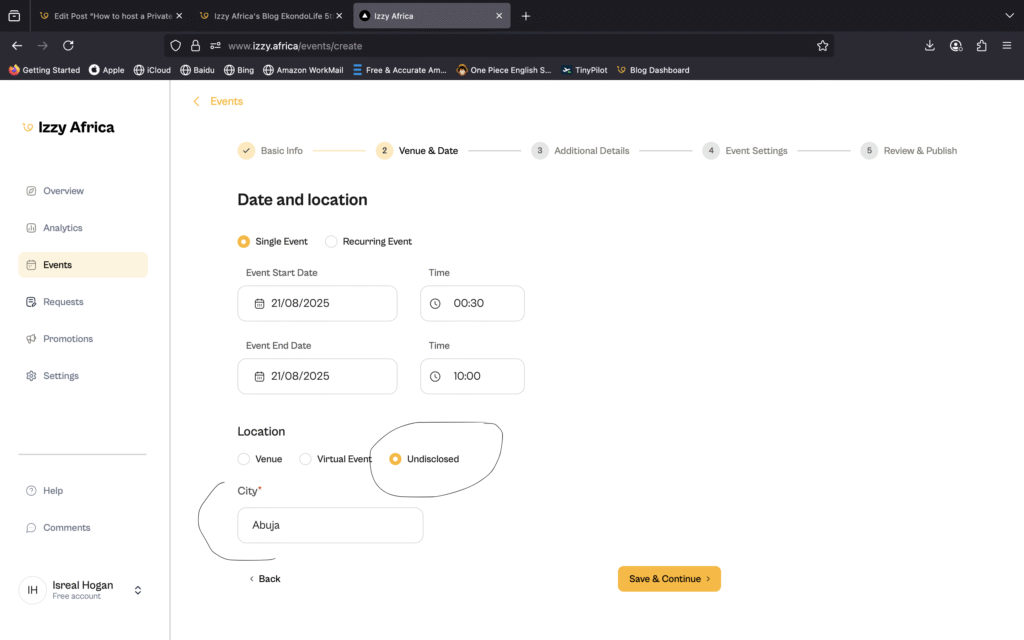
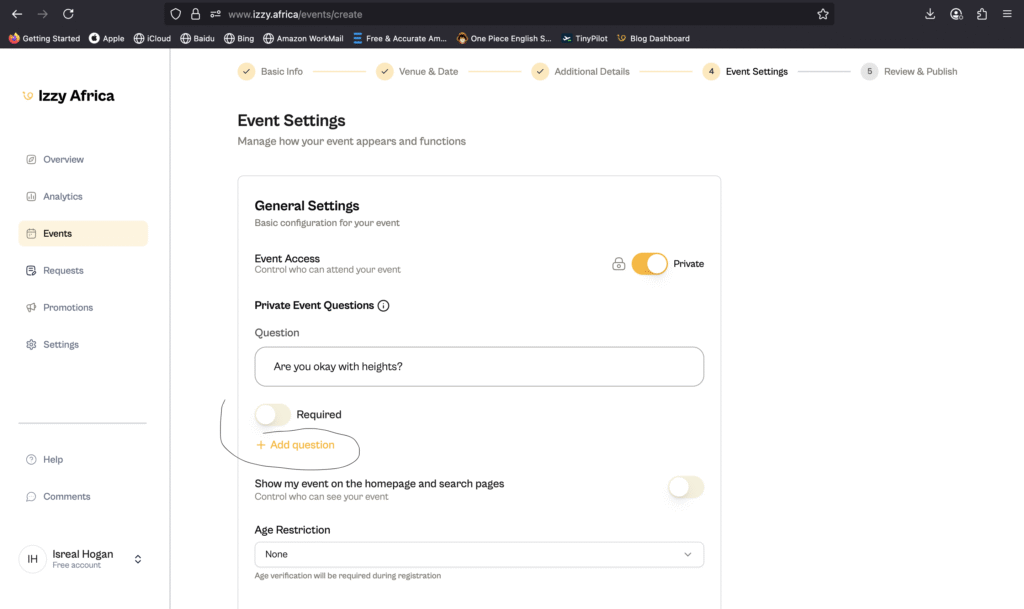
On the next 2 screens (as shown in the image below), you will be probed to select your event mode; wether to restrict access by selecting a private event or to make it public gor all, proceed to toggle the private event option.
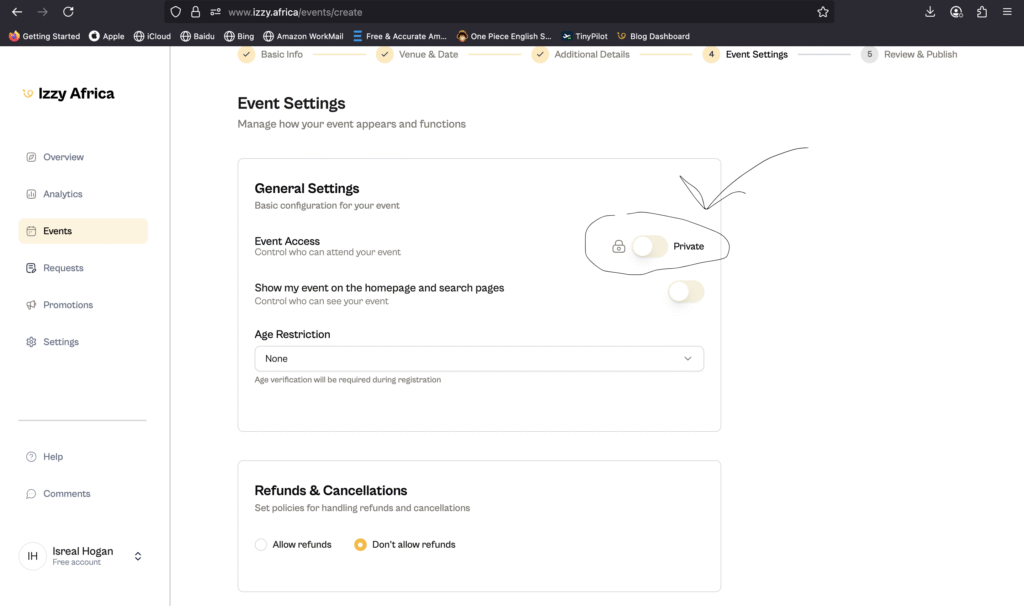
Once you switch it on, there will be an option to add event questions; these questions are optional by defauult but you can set them to be required, this way your users will have to answer the required questions before being able to register for your event.
You can also choose the “Show my event on hompage and search page” option if you want us to show your event to our visitors, this won’t affect your event being private.
Proceed to fill out the rest of the fields with details of your event and you should be good to go. Now that your event has been created you can copy and share the ticket link. When attendees try to cop a ticket, they will be prompted with this form
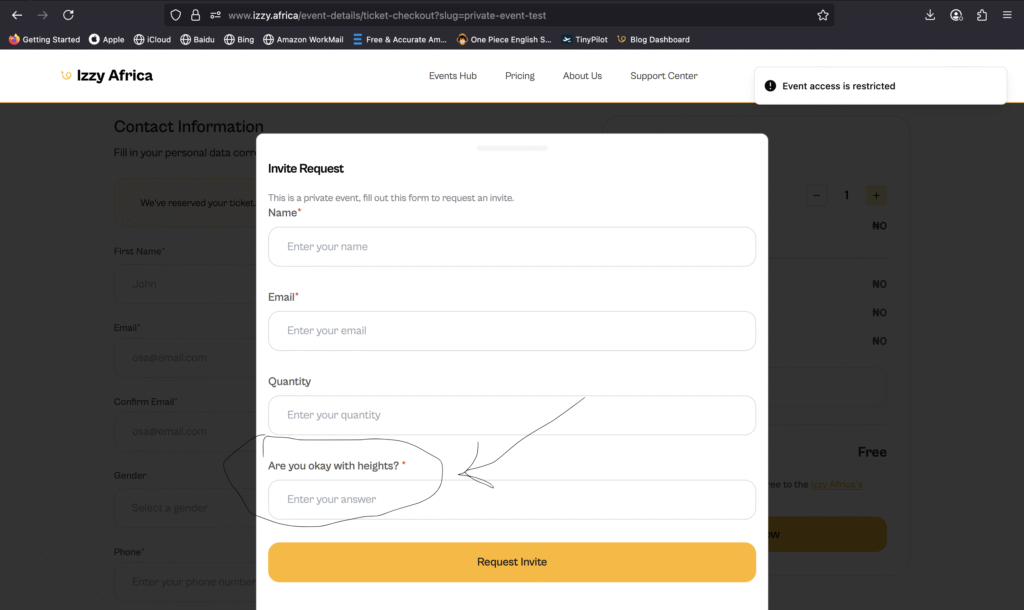
Note the question we added earlier is available and required. Once your attendee fills this form and submits, you will be able to view their answers on your dashboard on the “Requests” tab
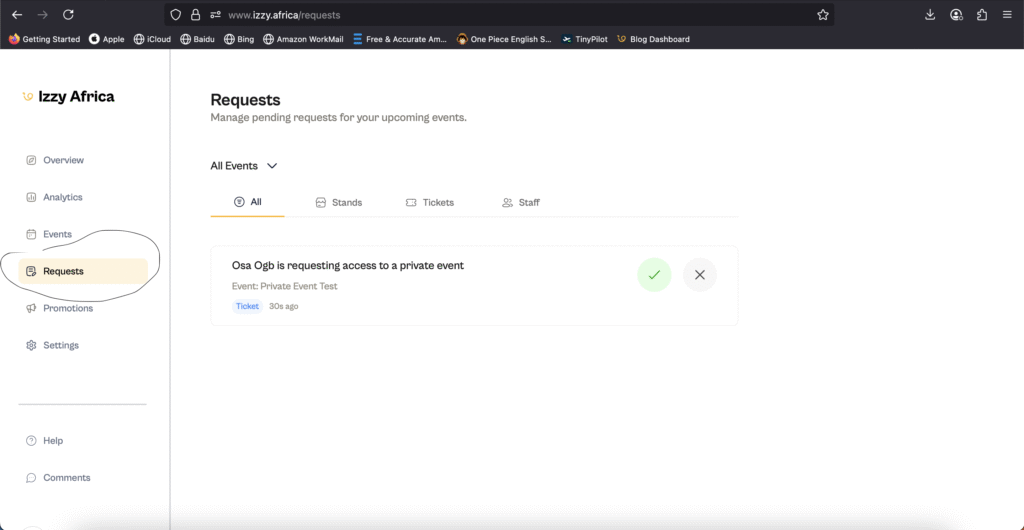
What happens if i approve or decline a request?
And just like that, your private event is all set up. Easy, peasy, with you calling all the shots. From vetting every guest to revealing the location at the perfect moment, you have complete control to build an unforgettable and secure experience. Feel free to checkout our other useful reads such as How to Sell Out any Event in Abuja